I saw several videos on people making new holes on their galvanized tub. I don’t have a metal drill cutter - and really you don’t have to do that. A simple elbow attachment with 3-4” pvc pipe is all you need and this odd tool [ratchet] to remove the plug.
Saturday, March 30, 2024
Overflow level
I saw several videos on people making new holes on their galvanized tub. I don’t have a metal drill cutter - and really you don’t have to do that. A simple elbow attachment with 3-4” pvc pipe is all you need and this odd tool [ratchet] to remove the plug.
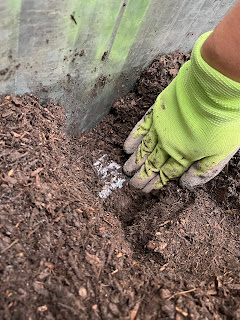
Add the soil, worms, compost and plants
Starting Wicking Beds
Living in a drought state I feel a need to do my part to help the environment- but I also love gardening. How can I water with wasting too much water… and when my plants need me the most during summer. I’m usually out on road trips and forget to water.
In Casa Castillo (aka my parents’ home) I decided to experiment with a wicking raised bed. I pick tall galvanized tubs so that they don’t need to bed over too much when gardening. The height also gives plenty of room to store about 4-6” of water in a reserve. There’s already a plug hole on the side making it easy to drain out excess over flow water.
How does it work:
(I found this image online, if it’s copyright infringement please let me know and I’ll remove it or if you are the owner of this photo let me know so I can give you credit).
This is something that companies already make if you don’t want to make your own. I bought a few and planted onions, and garlic in them.
With a galvanized tub I save the step of adding a pond liner since the tub is meant to hold water. But if you are using a wine barrel, pallet/wood bed, adding a pond liner is an important step.
Finding a location: this thing is large and will get heavy! Think of the size and where it will stay for the next 5-10years or more.
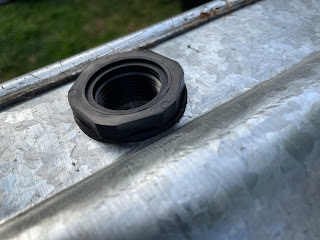
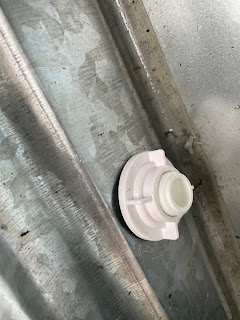
After finding the right spot. I had to tweak the plug a little: first I removed the plug. This was 3/4” hole, and I had bought the pvc and elbow at 1/2”, so I replaced it. Later I discovered they sell 3/4” pvc elbows and parts that fit this hole perfectly. So save a step and buy 3/4” attachments.
I also had to buy the tools to remove that drain outlet.
Add the 1/2” pvc parts:
Outside tub
Then attached 3” pvc pipe to the elbow the another 4”irrigation rubbing or pvc pipe so the water stays inside tube at a certain level. I didn’t glue it, as I want to move it up or down Incase the tub needs more or less water. Cut the irrigation (black) tubing about an inch lower than the height of water level. This is so soil doesn’t sit in the water and rot. This also helps roots not to grow into water basin.
Anything can be used to hold water. Some people use flexible drain pipes, flower pots, cinder blocks- I used 4” plastic fruit boxes. Since the holes were too big, I layered garden netting over it so the clay pebbles fill around and over it.
We then filled the sides and about 2inches on top with clay pebbles.
To prevent the soil sinking down into the water, we place a layer of lawn fabric over the pebbles.
We filled the tube with water so clay pebbles can absorb water and to check for leaks.
The next step will be to add soil, composting worms and plants.
Monday, November 27, 2017
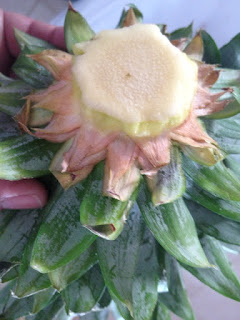
From Scraps to Plants (part 1)
 Most of
us throw away the inedible parts of our fruits and vegetables in the trash or
compost bin. Up until recently, I did
the same thing, until I heard Lorena, a garden friend, say that she grows her
own pineapples and she never bought seeds.
In fact, she didn’t even buy the pineapple. She was purchasing a fruit salad from a
street vender and she noticed he was setting aside the pineapple leaves with
the top part attached. After chatting it
up with him, Lorena asked why he setting aside the pineapples. He said he grew his own and that he also sold
pineapple plants to friends and neighbors. He explained the process to her and she passes
the word to me. Now, here I am sharing
my excitement with you.
Most of
us throw away the inedible parts of our fruits and vegetables in the trash or
compost bin. Up until recently, I did
the same thing, until I heard Lorena, a garden friend, say that she grows her
own pineapples and she never bought seeds.
In fact, she didn’t even buy the pineapple. She was purchasing a fruit salad from a
street vender and she noticed he was setting aside the pineapple leaves with
the top part attached. After chatting it
up with him, Lorena asked why he setting aside the pineapples. He said he grew his own and that he also sold
pineapple plants to friends and neighbors. He explained the process to her and she passes
the word to me. Now, here I am sharing
my excitement with you.Saturday, November 18, 2017
Jar Plants
 |
| The seeds after a few hours in the jar. |
 |
| The Dicot or Bean Seed begins to sprout leaves. |
 |
| After a day or two, both seeds have a root system growing. |
 |
| While both seeds have a root system growing, the seed is in different parts of the seedling. |
Thursday, November 16, 2017
BAJA NEWS: Since 2007: Seeds of Hope thanks to "El Campo en Nuestras Man...
_______________________________________________________________BAJA GOOD LIFE CLUBJoin the Baja Good Life Club today and SAVE big on Baja! Get Mexican Auto Insurance for for as low as $84.00 / year.www.bajagoodlifeclub.com/join-us.
I can't believe how many years have gone by since I last posted in my gardening blog! We've undergone several moves and my original garden is now but a distant memory of the blog posts. Luckily I have somewhat started a new garden and will start posting as it begins to develop. I'm also blogging for Baja News and wanted to share my most current blog post on sustainable gardening.
Sunday, April 10, 2011
So well bee behaved...

I recieved an email from a bee guy name Bao indicating he need to find new locations for his bee boxes. As many of my fellow friends now, I have been wanting to do the "bee thing" for a few years; but never got around to actually doing it until today... Bao will contine taking care of his bees and the bees in turn will pollinate my edibles and in turn I can slowly learn about bees and how to care for them. Bao took my bee box to help catch me a hive so that in the future, I can have my own bees. To learn more about bees check out the OC Bees Beekeepers. The bees seem very calm and friendly.


